VSERPI BUILD INFO
HARDWARE LIST
raspberry pi 3b or 3b+-raspberry pi 4 is not supported! neither are pi 2s or 1s! Maybe the OG rpi 3 might work out but I wouldn’t really bet on it. Just grab a 3b or 3b+! Note that some way older versions of 3b+ can have issues. These are noticable by the spring loaded sd card reader. You should only be concerned with this if you are purchasing something used as all currently manufactured 3b+s I’ve played with work great. UPDATE Feb 2024: The EOL pi 3b+ on sale these days dont work with the VSERPI images out of the box (no boot, blinky lights) but there is a mildly convoluted method to get things working. check out the VSE discord or scanlines.xyz for help with this or just get a pi3b.
5v 2.5a micro usb power adapter
-unfortunately so many of the raspberry pi power adapters out there say 5v 2.5a but don’t really deliver that reliably. You will know that yr power supply is not up to snuff if you see a little lightning bolt icon in the upper right hand corner of the screen!. Def check the link provided as this one seems to reliably deliver working power supplies (like 95% of the time).
sd card (8G minimum, 16G recommended)
-only real thing to look out for here is counterfeit or used sd cards. Every sd card has a limited number of ‘read/write’ operations that can be performered before their failure rate gets close to 100% so used sd cards should be avoided. The only way to gauge if a card is legit or not is by purchasing from a highly rated supplier. Theres not really anything to gain by getting a 32G or 64G sd card for this scenario, larger numbers don’t always just automatically translate to better performance in embedded systems! Of course if you are planning to use yr Waaave Pool for more general purpose stuff other than just running the VSERPI synths then you might want to grab a larger card but you can also easily just use thumb drives as well.
breakout cables for a/v
-the important thing to note here is that this 3.5mm TRRS (tip ring ring sleeve) breakout cable is wired a bit differently than most of the ones you’ll find on the marketplace. Check out the infographics in the links for more info, if yr interested in resplicing your own cables though the main thing to note is that video needs to go through the SLEEVE and ground through the RING directly above the SLEEVE of the tip ring ring sleeve wiring schema. Don’t leave out the ground rewiring this can lead to a really crappy signal and potential damage of components!
class compliant usb camera with 640x480 capability
-class compliant is a formal way of saying ‘this camera doesn’t need any kind of driver installs/hands on configuration to work and instead adheres to an industry standard for encoding data’. Another useful search term is ‘UVC video’ which is the encoding standard needed to interface with any of these devices. Please also note that the camera will need to have the option of delivering video at a resolution of 640x480p! There is nothing to gain by picking up a usb camera that is capable of 720p or 1080p. Not only that but if yr camera ONLY delivers 720p or 1080p then it 100% will not work! Unfortunately not every webcam manufacturer is explicit about every single resolution their cameras are capable of. Like if you check the specs for a logitech c270 you will see that it only says ‘max resolution 720p,’ leaving you to infer that it’ll most likely deliver 480p video as well (spoiler alert: it definitely does and i recommend these as being the nicest cameras to use with any of the VSERPI devices).
On the other hand this 1080p Webcam only says ‘resolution:1080p’ leaving one to infer that it is the only resolution that it delivers. Spoiler alert: this one doesn’t work and only does 1080p out.
class compliant usb midi interface (korg nanokontrol2 recomended)
-I’ve made a scene setting for the NK2 and Nicole Pichon has helpfully made and shared one for the NK1. These two remain the optimal midi controllers to use for these instruments in my opinion bc they offer the most amount of continuous controllers and toggles for their prices. Every one of these instruments uses the exact same scene setting so you will only need to change the settings on your midi controller. IT IS ALMOST NEVER NECESSARY TO CHANGE ANYTHING ON THE WAAAVE POOL ITSELF IN ORDER TO USE DIFFERENT MIDI CONTROLLERS! All you need to do is consult the default Midi CC list infographic which is provided in every manual, open up the midi scene editing software that your usb controller provides, and change all the ccs to match up with the ones that the VSERPI expect! If you have made a scene setting for some other brands of controllers and want to share it with others send it to me at ex.zee.ex at gmail dot com and I’ll include it in the list!
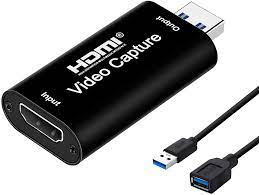
HDMI video input
-even if this particular link is broken or inactive the main thing to look out for here is that you are looking for a single piece and incredibly cheap (8-12usd) HDMI->USB capture card that looks like this
Analog Video input
-Theres a lot of cheapo usb analog capture cards out there! Many don’t deliver Class Compliant Video! Many do but are unstable and have really shoddy video quality! This one recommended in the link seems to be a pretty decent option that doesn’t ‘break the bank’. I’m not telling anyone that they should never ever use anything else, but I am telling yall to be prepared for shit to get a lil glitchy at times (not like fun circuit bent glitch but like ‘oh shit the video froze up’ kind of glitch.
OPTIONAL EXTERNAL HATs
hifiberry ADC/DAC (auto_waaave, phosphorm)
MIDI CONTROLLER SCENE SETTINGS
nanokontrol2 (for use with Korg Kontrol Editor)nanokontrol1
NK2 and NK1’s out of the box will not work with these instruments! you need to edit the midi settings using the korg kontrol editor app in order to get them work properly, please consult the instructions for korg kontrol editor for details on how to load and transmit a saved midi scene setting to your nanokontrol!
MIDI CONTROLLER OVERLAYS
Here is a link to a folder that contains a bunch of overlays and graphical control reference that users have made (i have made zero of these). please let me know if you’d like explict credit on the files you have shared in here and please email me with any more that you might make/have previously made with the subject line “VSERPI NK2 OVERLAY”.IMAGES
to install an image you will need :1.an archiver tool (winRar or the Unarchiver recommended for windows and mac respectively. Note: seems like WinRar drops the ball every so often, maybe try 7zip instead if WinRar is failing?)
2.Balena Etcher (or any imaging software)
3. a micro sd card with at least 8g of space (16 recommended)
4. an sd to usb thumb drive
Once you have all of these items assembled you will need to download the appropriate image and expand it using the archival tool. Once it has been expanded (you should see something like WAAAVE_POOL.img show up) plug in your sd card and open up Balena Etcher. You will see a menu that asks you to select the drive you wish to write to and the image you wish to write. Double check that the drive you are selecting is your sd card, it can be a major bummer to write to the wrong drive! Let the Etcher do its work and once it says you are finished, plug it into the slot on the rpi making sure that the pins are facing towards the board, make sure that all of the usb and video out cables are plugged in and then power up and have fun!
/** TROUBLESHOOTING**/
![]()

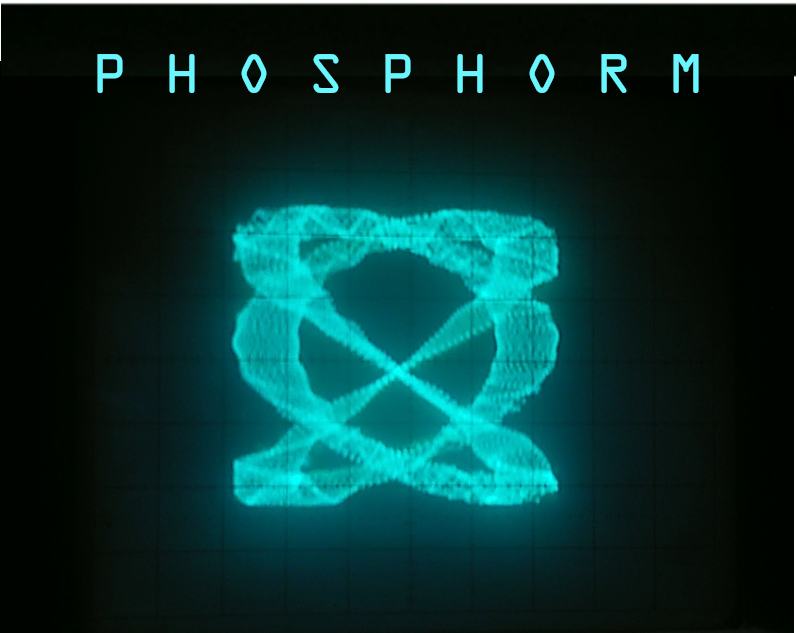
“My analog video out looks like this!”
This is an issue with the TRRS analog breakout cable! Scroll back up to the section about what kind of cables do and do not work and either resplice the cable u gots or pick up the recommended cable I link to in order to fix this issue
“The sliders on my nanokontrol2 are not working but all the knobs seem to work great”
This is because yall didn’t write the scene setting to the nanokontrol via the Korg Kontrol Editor app! Scroll up to find a download for the scene setting and grab that app to change the midi ccs on your controller.

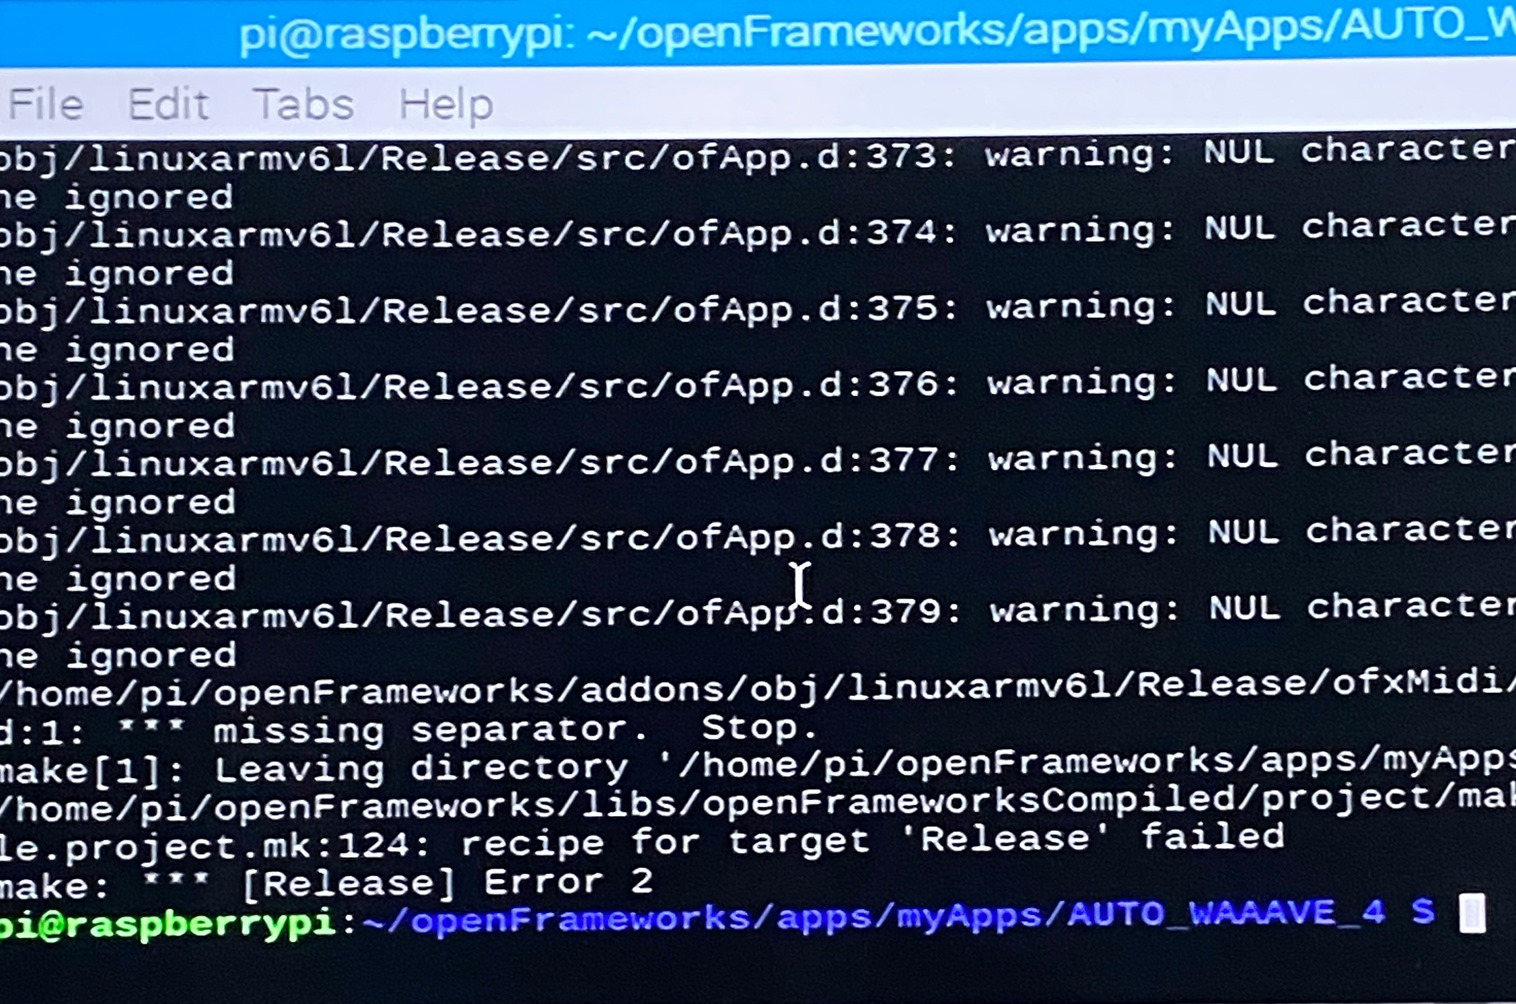
“I just booted up my VSERPI for the first time and I see this crazy text spew about kernel panics or NUL characters!”
This is an issue with a ‘corrupt’ image. Corruption can happen at a couple of stages in between downloading the image and getting it onto the card. First off if your download got interrupted at any point the image can become corrupted. If you are using a different kind of archival tool than I recommend up above to extract the image from the archive then the image can become corrupted. If you are using something other than Balena Etcher to write the image to the SD card then the image can become corrupted. And finally if the SD card yalls is gots is dying then the image can become corrupted! Try to work your way through this list and repeat every step following the guidelines up above. If you try multiple times following all the the guidelines to a T and you are 100 percent positive that the SD card is totally legit working then please drop me a line bc sometimes google drive (where i’m storing these) can fuck up data too!
No you will almost definitely fry your shit if you try this.
“Can I use both the HDMI and Analog Video outputs at the same time?”
Nope! Also really useful to note that if you have both HDMI and the analog cables plugged in at the same time then the VSERPI will always default to HDMI.
“Is there any way that I can get HD input/output from one of these?”
This is two questions! Before answering either its important to understand that no matter what, all of the internal processing done in the VSERPI is maxed out 640x480p except for Artificial Life and Temporal Vortex who both work at 320x240p.
If you are using the HDMI capture card recommended then you can grab just about any resolution from 1080 on downwards and it will be converted down into the appropriate resolution internally. If are trying to use a usb camera that only delivers 720p, 1080p, or 4k video then thats just not going to work.
If you want to do HD video output I highly recommend looking into picking up some kind of stand alone hardware upscaler! Remember that HDMI and DVI are nearly 100% of the time simply different connectors that deliver the same signals! If you search the message boards you will see that I have offered some folks really really hacky HD output solutions that sacrifice frame rates for pixel doubling/pixel quadrupling upscaling solutions at the end of the chain but I really discourage this as I feel it makes the instruments look kinda slow and choppy and crappy. Higher resolution doesn’t mean better video. Larger numbers are not just default better than lower numbers. Its all about context my friends. Even 320x240p looks fucking great with the right engine, like literally every video game system up until like PS2 worked with these resolutions and folks were able to do some really beautiful stuff within these limitations!
/* * I M A G E S * */
FOR ANYONE WITH A CAPTURE EDITION THEY PURCHASED FROM MY ETSY SHOP/KICKSTARTER IN 2020 AND/OR ANYONE WORKING WITH THE PICAPTURE SD1 PLEASE CHECK THE LEGACY SECTION BELOW THIS ONE FOR IMAGES FOR YR SYSTEMS! EVERYONE ELSE SHOULD GRAB THESE IMAGES FOR USE WITH BASIC PLUS, BAREBONES, or CAPTURE BUNDLE SETUPS kk!


LEGACY SUPPORT: If you don’t have a Capture Edition purchased from my etsy or kickstarter from 2020 this is not relevant to your lifestyle
1.5 Capture Editions images!
(note: hello word and super haeckle adventures doen’t have capture edition versions b/c they don’t take any video input, just use the regular old versions above for thems)
Waaave Pool NTSC
Waaave Pool Pal
Spectral Mesh NTSC
Spectral Mesh PAL
Artificial Life NTSC
Artificial Life PAL
Auto Waaave NTSC
Auto Waaave PAL
Temporal Vortex NTSC
Temporal Vortex PAL
Chromatic Aberration NTSC
Chromatic Aberration PAL
Auto Mesh NTSC
Auto Mesh PAL
Convolutional Chaos NTSC
Convolutional Chaos PAL
VERSION 1.4 Capture Editions images!!
Waaave Pool NTSC
Waaave Pool PAL
CV NTSC (for use with waaave pool CV expansion board)
CV PAL (for use with waaave pool CV expansion board)
Spectral Mesh NTSC
Spectral Mesh PAL
Artifical Life NTSC
Artifical Life PAL
Auto Waaave NTSC
Auto Waaave PAL
Temporal Vortex NTSC
Temporal Vortex PAL
WAAAVE POOL CV images
CV NTSC (for use with waaave pool CV expansion board)
CV PAL (for use with waaave pool CV expansion board)
OLDER IMAGES
How to switch back and forth from PICAPTURE SD1 Capture input to USB video input on the LEGACY Capture Edition Images
To change any USB input image to CAPTURE input via the piCaptureSd1 you will need to do the following. For the purposes of this guide i will use Waaave Pool as an example but these steps work the same with any image. In order to change from CAPTURE to USB input the process is the same except you change “bool inputswitch=0” to “bool inputswitch=1”
1. plug a usb keyboard into the unit and power it on. Once it is running hit "esc" on the keyboard and you will exit to a desktop environment. click on or select the folder icon near the top of the screen and navigate to home/pi/openFrameworks/apps/myApps/WAAAVE_POOL_MAIN/src/ and then within src you will double click on ofApp.cpp.
2. ofApp.cpp will open up in a text edition environment. Scroll down a tiny bit and you will see a line that says "bool inputswitch=1", you will delete the 1 and replace it with 0. Hit ctrl-s to save the changes. don't change anything else in this code (unless you know/want to learn how to program in c++ and want to try modding things out!)
3. Close the text editor and back in the folder navigate up two levels until you are in home/pi/openFrameworks/apps/myApps. right click on WAAAVE_POOL_MAIN folder and select "open in terminal"
4. A terminal opens up, waaave pool will try to automatically run, hit esc to cancel that operation (might take like 30 seconds for this). Once you have a terminal prompt that you can type into enter "make", wait for all the coding things to execute, and then when you have a terminal prompt once again, plug a video source into the capture card and enter "make run" into the terminal

If you appreciate the public domain open source software and educational materials I provide and can afford to spare some cash it is highly appreciated! The more donations I recieve the more time I have to spend on developing these resources! Please also consider subscribing to my patreon page as small amounts of regular income are appreciated as well! Or you could also support my ko-fi if you like getting stickers and stuff on a regular basis.